If Your Alarm Is Going Off For No Reason Try This Simple Procedure.
Are your neighbours getting annoyed?
Are you reluctant to even use the system anymore?
NO PROBLEM! YOU’VE COME TO THE RIGHT PLACE.
I’ve been fixing this exact problem since 1985.
I’ve also trained over 50 alarm technicians to fix house alarms that go off for no reason.
Many of them now work for some of the biggest security companies (They’d like to charge you a fortune to do this simple job for you!)
I’ll show you what you can do right now to get it fixed today.
First though, a question:
Is the system ONLY going off when you’re out? By that I mean when you’ve armed the alarm and you leave the house. If the answer is yes read on.
Or….
Does you alarm system go off even when it’s turned off? No Problem! I’ve found a very useful and well-written article here that shows you deal with that issue.
WARNING: Some faults require special tools and equipment so I can’t guarantee that what I show you will definitely fix the fault.
However based on my experience you stand a pretty good chance.
You’ll Need: A clean dry cloth or a feather duster, a small screwdriver but a butter knife will do, some fly spray, your alarm’s user manual (get it here if you haven’t got one) a small step ladder.
All set?
Ok, let’s go to work!
Check the Alarm System Memory
The problem will be caused by one of your sensors. Our first job is to find out which one. If you already know feel free to jump straight to step 2.
To find out which sensor caused the alarm go to your codepad. If you haven’t used the alarm system since the last time it went off, the zone light corresponding to the faulty sensor will be flashing on the codepad.
If it’s not, we can check the alarm memory. The way to do this will depend on the type of alarm system you have so we’ll need to grab the user manual. Download manuals here
Check the manual’s index for something like ‘Event Memory Recall” or ‘Viewing Alarm Memory’ or ‘How to Display Events From Memory’.
Follow the procedure outline here to determine which one of your sensors is going off. It will make the job easier .
NOTE: If you can’t find your user manual, or you’re having trouble finding out which sensor is being triggere, no problem!
Just apply the following steps to ALL your sensors.
Get your ladder and climb up to the faulty sensor.
Give it a quick visual inspection.
Does everything look OK?
Is there any obvious damage to the sensor?
Are there spider webs on or around the sensor. You may not be able to see them so gently feel around the sensor.
Using your duster or cloth, gently dust around the sensor. Then wipe away any dust or webs from the sensor itself.
If the sensor is damaged, especially the lens on the front, that will be the reason your system is triggering when it’s armed.
You’ll need to either isolate or Bypass this sensor each time you arm the system or replace it. Refer to your trusty User Manual to see how to Bypass Zones for your particular system.
If you want to have a go at replacing it yourself send me an email with a photo of the sensor and I’ll give you some guidance.
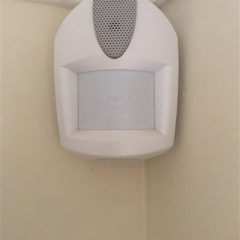
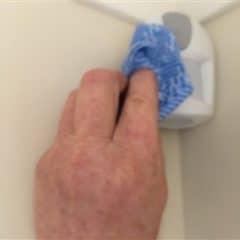
Spiders? Bugs? Insects?
Is your PIR sensor is mounted in the corner of the room?
Notice the small gap behind the sensor?
It’s a favorite place for insects and other creepy-crawlies to nest or hide.
You need to remove them. If they walk across the front of the sensor, or get inside the sensor, they will cause a false alarm.
Using the handle of your feather duster or a knitting needle or similar object, poke behind the sensor.
This will disturb and annoy any pests lurking there. They will come running from behind the sensor so be ready!
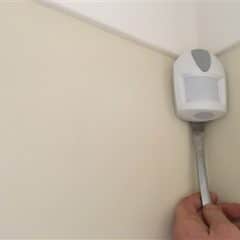
Look Inside
Next, carefully remove the cover of the sensor.
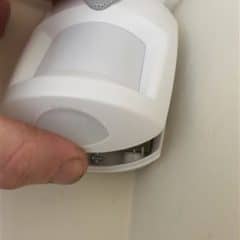
You’ll need a small screwdriver or a butter knife to open the case. You should see a small slot either under or on top of the motion detector’s lid.
Insert the screwdriver or knife until you press the latch far enough for the lid to be removed. (see photo below)
Have a look inside the sensor. You’re looking for more signs of insects, spiders and dirt.
Remove anything that shouldn’t be there using your soft, dry cloth.
Take care that you don’t move any of the electronic components and don’t touch anything with your fingers.
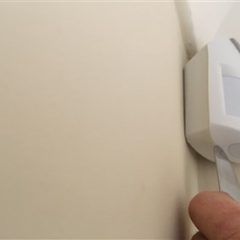

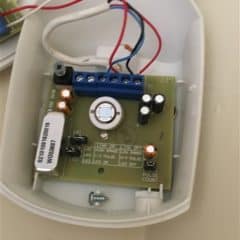
While you have the cover off, check that the sensor is secured to the wall properly. Tighten the mounting screws if necessary.
When you’re done, clip the cover back on to the PIR sensor
Cheap Insurance
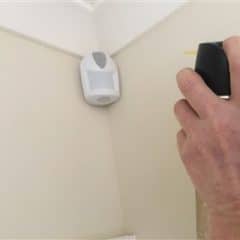
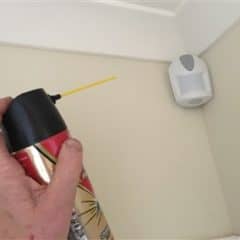
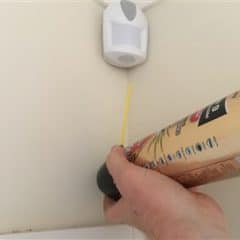
Last of all give the area around and above the sensor a gentle puff of fly spray. The surface sprays such as Baygon are best.
This will deter insects from getting close enough to the detector to cause any false alarms.
Be careful not to give the sensor a massive ‘face-full’ of the spray. Just a short squirt from about 6 feet away will do the trick.
It’s a good idea to spray the wall and cornice on either side of the detector too.
Finally another small squirt behind the sensor and you’re all done.
Test Your Security System
The procedures you’ve carried out are what an alarm service technician would do, but charge you around $150.00 for.
Now you can start using your security system again as normal. That’s the only way to know for sure that you’ve fixed the problem.
If you found (and evicted) any bugs, insects or spiders you can feel confident that you’ve solved the problem.
Even if you didn’t, often a simple clean and dust of the sensors can fix a false alarming issue.
It’s a good idea to follow the above procedure for all your PIR motion sensors at least every 12 months.
You can also do it before you go on holidays to make sure you want have any problems while you’re away.
Alarm Still Going Off For No Reason?
If the fault re-occurs, I would suggest replacing the sensor.
You can also do this yourself. It’s not difficult and you can save yourself a lot of money.
Alternatively you could contact your installer or a competent alarm service technician to sort it out for you.
You can also Bypass the faulty alarm zone while you work out the best next step. That way you can still have most of your home protected by the alarm system without bothering the neighbours with unwanted alarms.
Check your Alarm System User Manual to see how to do this simple procedure.
I hope you’ve found this guide to be helpful.
Please leave a comment and feel free to share this information with anyone you think could benefit.


